This page is for the person who keeps a Darling install running after the first week. Each heading is one task. The tasks are add a server, remove one, change a monitoring password and rotate a token. Then come pause and resume, upgrade, uninstall and where everything lives.
Every screen here comes from Darling 3.11.0 on a plain Windows Server 2022 VM that monitors one SQL Server, SQL2019. The first install is on the Install Walkthrough. The three ways to look at your data are on Using Darling.
Last checked against Darling 3.11.0 in October 2026. The text version of this page, with more detail, is docs/darling/admin.md on GitHub. That file follows the development branch, so it can describe things that 3.11.0 does not have yet. This page leaves those out.
Run the command line verbs on the service host, in an elevated PowerShell, from the folder that holds PerformanceMonitor.Darling.Service.exe. The default folder is C:\Program Files\PerformanceMonitorDarling.
Read this first: darling.json is only a seed for the server list
The service reads the servers list in darling.json when the store has none, which is the first start. After that the store holds the server list, and editing the file adds nothing. To change the list, use one of these:
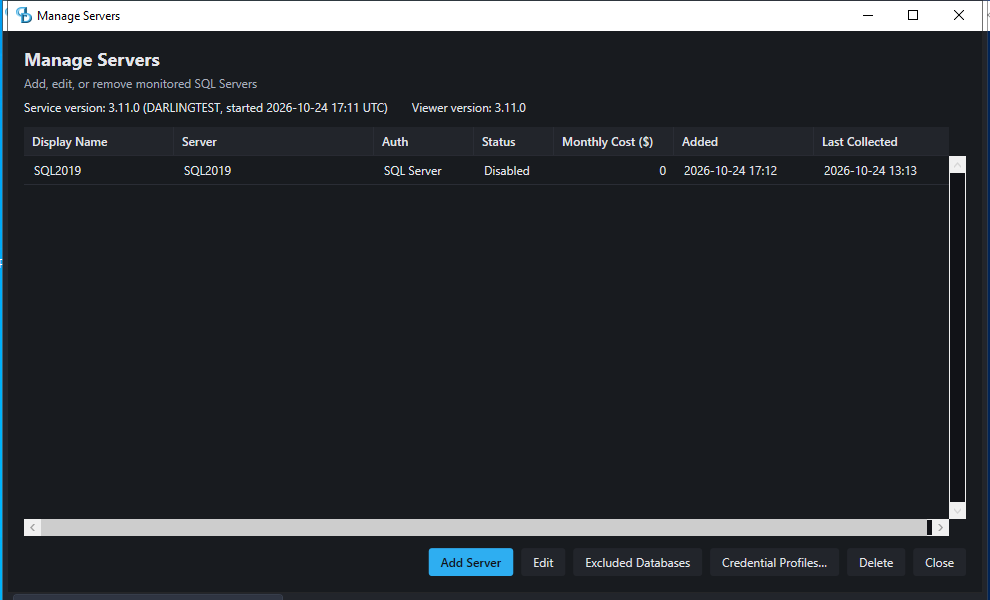
- The Viewer: Manage Servers, shown below.
- The
add_servers,edit_serverandremove_serverMCP tools. They are off until darling.json setsmcp.allowWritesandmcp.allowServerAdmin. - The
--add-servercommand line verb. It can add servers. It cannot remove one.
The web dashboard’s Admin page can edit a server that already exists. It cannot add, remove, enable or disable one, and the page says so itself (screen in the password section below).
The full list of what the file still controls is in the Darling README.
Add a server
- Make sure the monitoring login exists on the target server. The T-SQL block that creates it and grants what Darling needs is on the permissions page. This version has no verb that prints it for you.
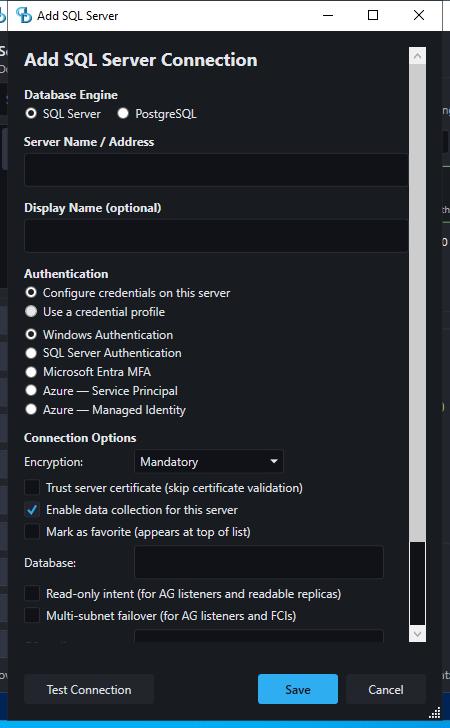
- Add the server. In the Viewer, click Add Server in the sidebar, fill in the dialog and save. If you want an answer before you save, press Test Connection first. The sidebar also has Add Multiple for a batch.
- Or add it from the command line. The verb reads a JSON array on standard input, in the same shape as the MCP
add_serverstool.hostis required.authisWindowsorSQL. A SQL login also takesusernameandpassword.
'[{"host":"sql01","auth":"Windows"}]' | .\PerformanceMonitor.Darling.Service.exe --add-serverFor many servers, put the array in servers.json and run Get-Content servers.json | .\PerformanceMonitor.Darling.Service.exe --add-server. A SQL login puts its password into the JSON on your command line, so use the Viewer dialog for those. The running service picks up a new server without a restart. I did not run this verb on the VM, because it adds a server. The command comes from the verb’s help text and the README.
After a minute or two, open the Overview tab in the Viewer. The Fleet Health tiles and the server’s card show whether it is collecting.
Remove a server
There is no command line verb that removes a server. Use the Viewer or MCP.
- Optional, and only while the service still monitors the server: preview the sessions that
--drop-xe-sessionsdrops from it. The verb lists three shared Extended Events sessions (deadlock, blocked process and attention) and a session that belongs to another install, which it never drops. Other tools can use the same session names, such as Lite or another Darling, so read the warning at the top of the output. If the list is right, run the verb again without--dry-run. - In the Viewer, open Manage Servers, select the server and click Delete. Confirm the question. Through MCP, call
remove_serverinstead. - The service stops collecting from the server at its next config reload.
.\PerformanceMonitor.Darling.Service.exe --drop-xe-sessions SQL2019 --dry-run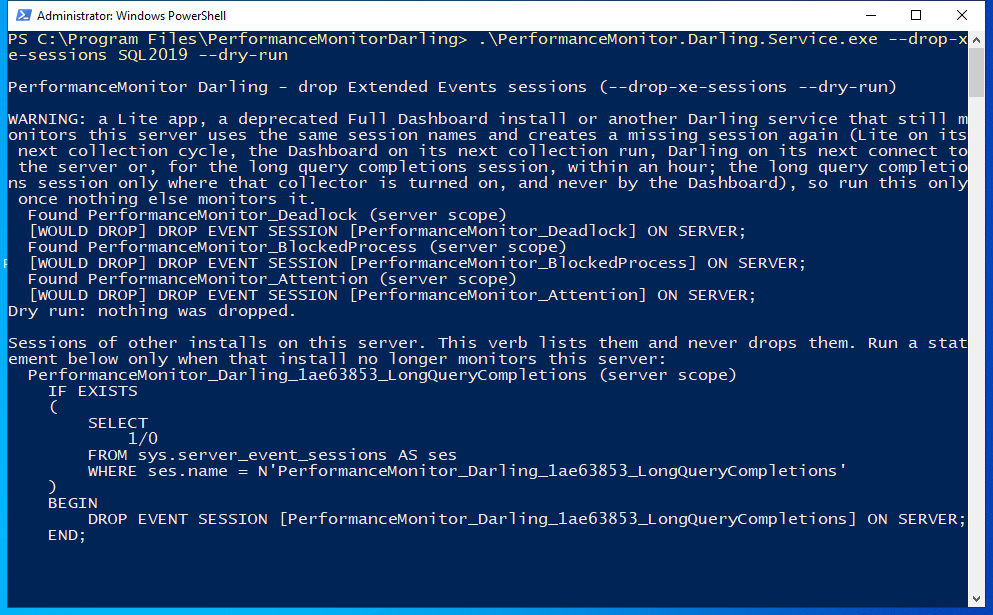
I ran the dry run on the VM, then removed SQL2019 in the Viewer. The question says what the delete does.
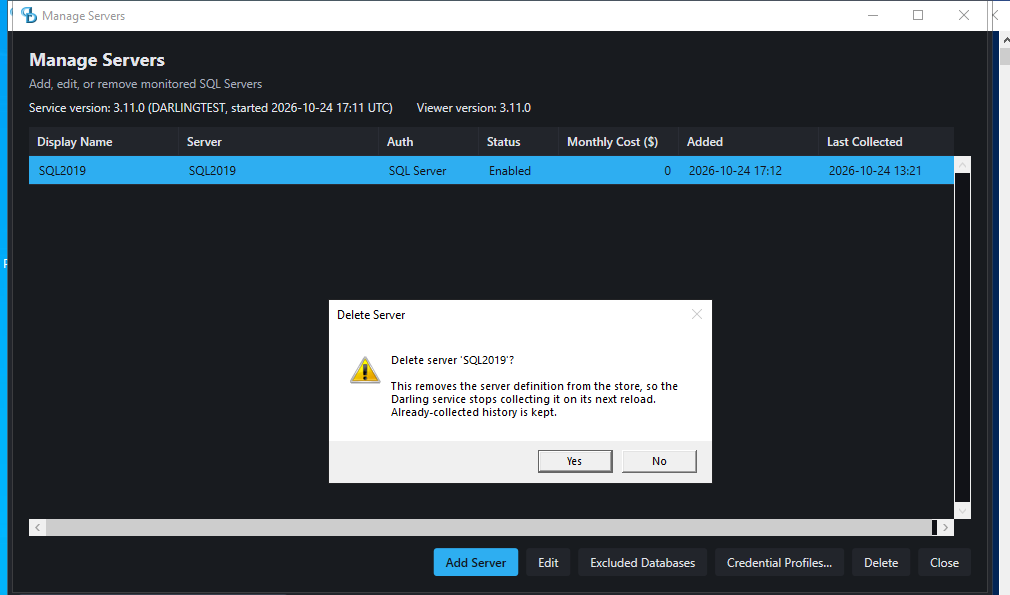
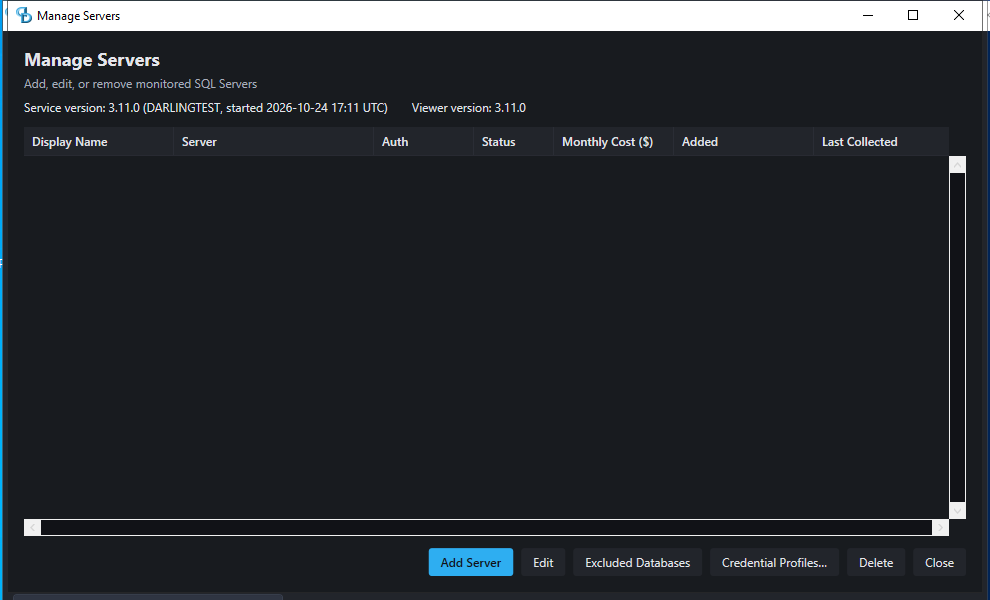
What the delete changed on the VM:
- In the store: the server definition is gone. The question says the history already collected is kept, and the service log says the history stays until retention ages it out.
- In the service: the log recorded
Removed from the monitored set (disabled/deleted)and the control-plane reload within about a minute. After that the service monitored zero servers and kept running. - On the monitored server: the four PerformanceMonitor Extended Events sessions stayed on SQL2019, and that is correct. A removal, from the Viewer or with the MCP
remove_servertool, drops only this install’s own sessions. The dry run above found none of those on SQL2019. It listed the three shared sessions and a session of another install. The README says the named form of the verb works only before the removal. After it, run.\PerformanceMonitor.Darling.Service.exe --drop-xe-sessions --print-sqlinstead. It connects to nothing and prints guardedDROP EVENT SESSIONstatements for you to run on the server yourself. - The monitoring login: removal does not touch it. If you no longer need it, drop it on the server yourself. I did that on SQL2019 for the login this walkthrough used.
To stop collecting from a server and keep its definition, disable it instead. See the pause section below.
Change a monitoring password
Which steps you follow depends on where the server entry came from. For a server you added with the Viewer, the command line or MCP:
- Change the password on the monitored server.
- Open the server for editing. In the Viewer, open Manage Servers, select the server and click Edit. On the web dashboard, open the Admin page, then the Servers tab, and click Edit on the row. Through MCP, call
edit_server. - Type the new password and save. This is the Viewer’s edit screen with the box empty. I did not change the password.
- Check the server’s card on the Overview tab after the next pass.
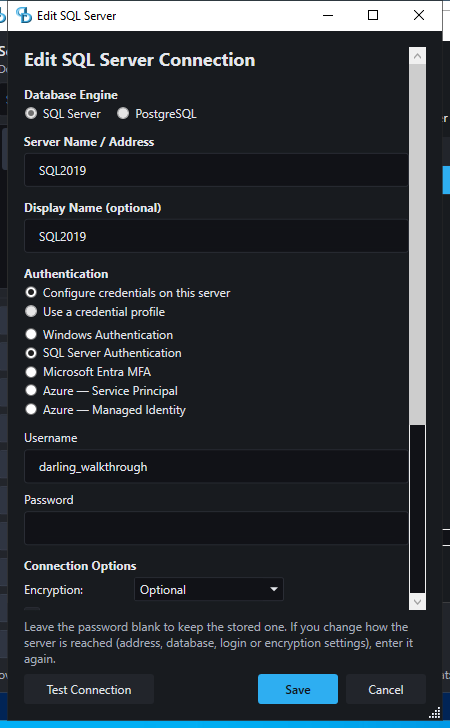
A blank password keeps the stored one. A saved password is sealed to the connection it was saved with. If you also change the address, database, login or encryption setting, enter the password again in the same edit.
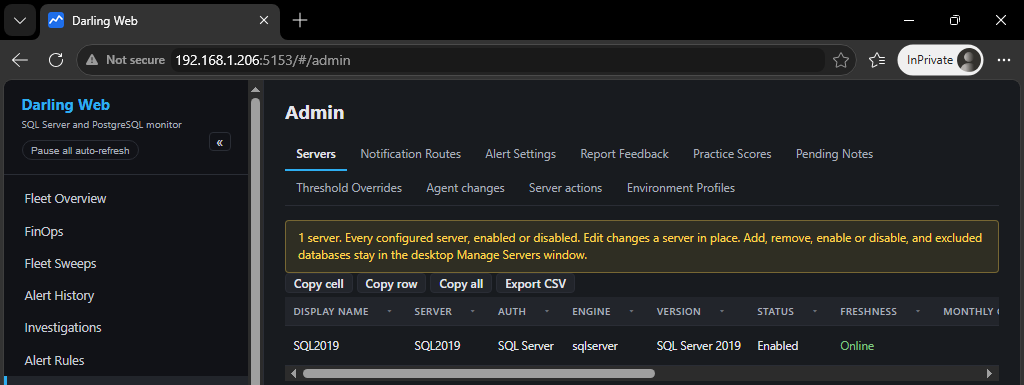
For a server that still takes its password from darling.json (an encryptedPassword value), the steps are different. Change the password on the monitored server. Then, on the service host, run this and type the new password when it asks. The verb prints a blob that is bound to the machine, so make it on the machine that runs the service.
.\PerformanceMonitor.Darling.Service.exe --encrypt-passwordPaste the blob into that server’s encryptedPassword in darling.json. Edit the file as text, because it allows comments. Then restart the service with Restart-Service 'PerformanceMonitor Darling'. I did not run these steps on the VM.
Rotate the web or MCP token
The token is a secret in darling.json. The web.network and mcp.network blocks are read from the file only, so a change needs a restart. This screen shows where the two tokens live, with their values hidden. The first block is the web dashboard on port 5153. The second is MCP on port 5152. A rotation breaks every client until it gets the new token, so I did not rotate one on the VM.
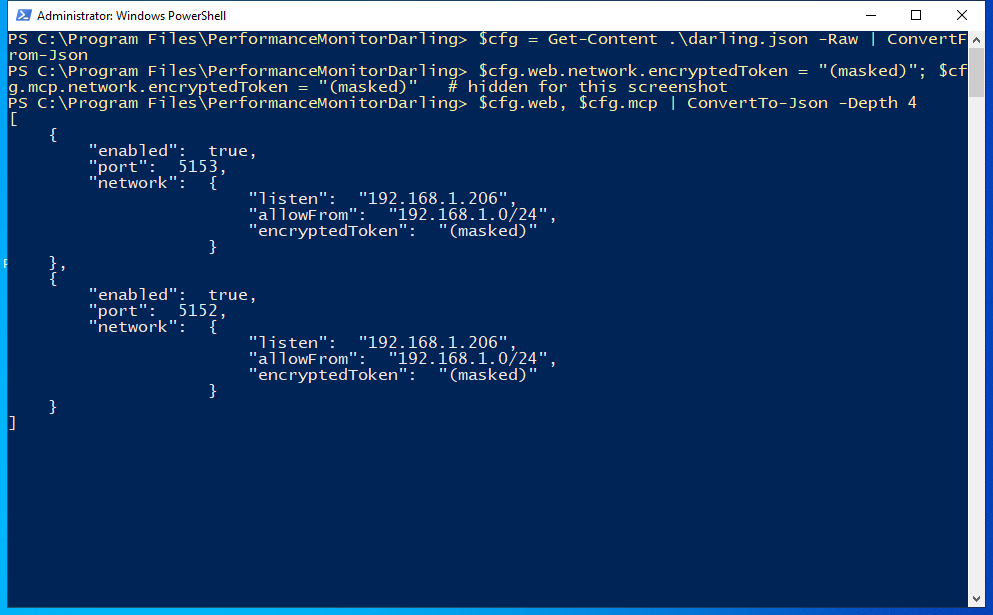
- Make a new token of at least 16 characters, with at least 6 of them different. The Darling README has a PowerShell one-liner that makes one.
- Run
.\PerformanceMonitor.Darling.Service.exe --encrypt-password, paste the token when it asks, and copy the blob it prints. - In darling.json, replace the blob in
web.network.encryptedToken(the dashboard) ormcp.network.encryptedToken(MCP). - Restart the service:
Restart-Service 'PerformanceMonitor Darling'. - Check the result with
.\PerformanceMonitor.Darling.Service.exe --print-web-tokenor--print-mcp-token. This writes a live token to the screen, so do it where nobody else can see it. - Give the new token to every client. Browsers sign in again on the dashboard’s sign-in page. Each MCP client needs the new bearer header. The old token stops working at the restart.
--configure-network can also make a token for you.
Pause and resume collection
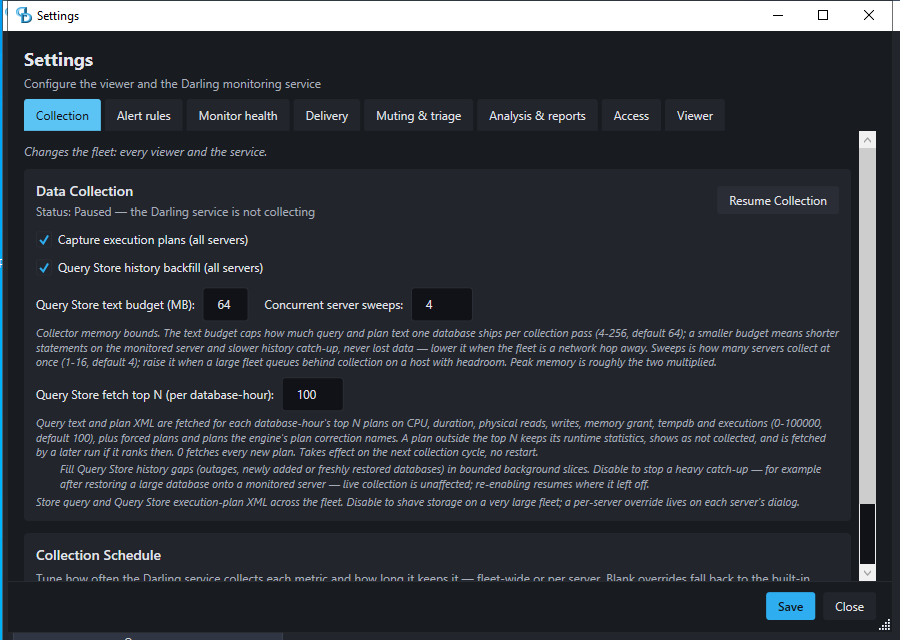
To pause all collection, open Settings in the Viewer. On the Collection tab, under Data Collection, click Pause Collection. The status line changes to Paused and the button becomes Resume Collection. This is the screen after the click.
I paused and resumed the VM this way. The service log recorded the pause, then a reload that said paused: True, and a later reload that said paused: False. Through MCP, the tools are pause_collection and resume_collection, and they need mcp.allowWrites.
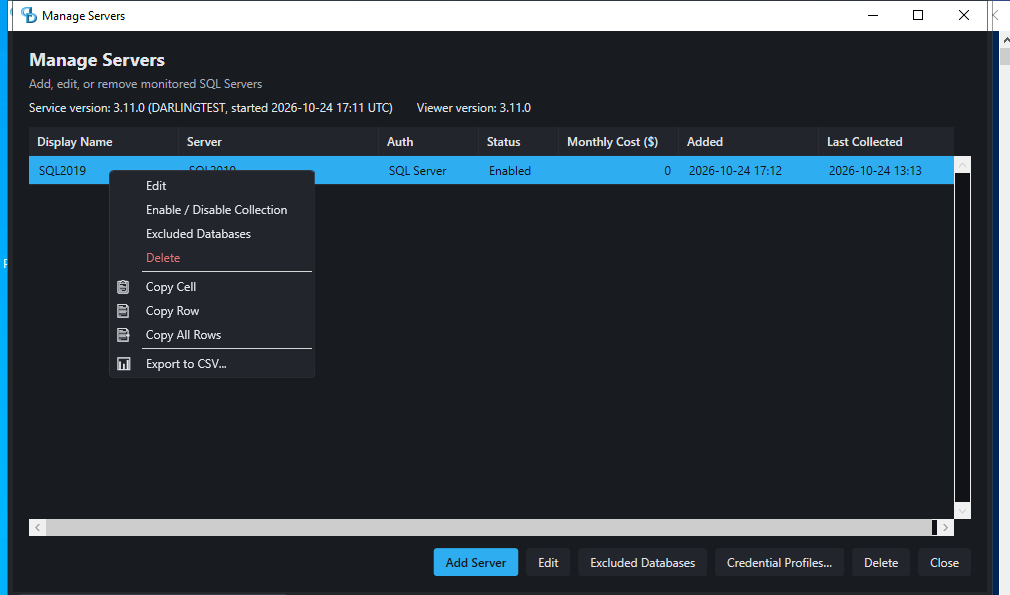
To pause one server, open Manage Servers, right-click the server and click Enable / Disable Collection. The same two actions exist in MCP as disable_server and enable_server.
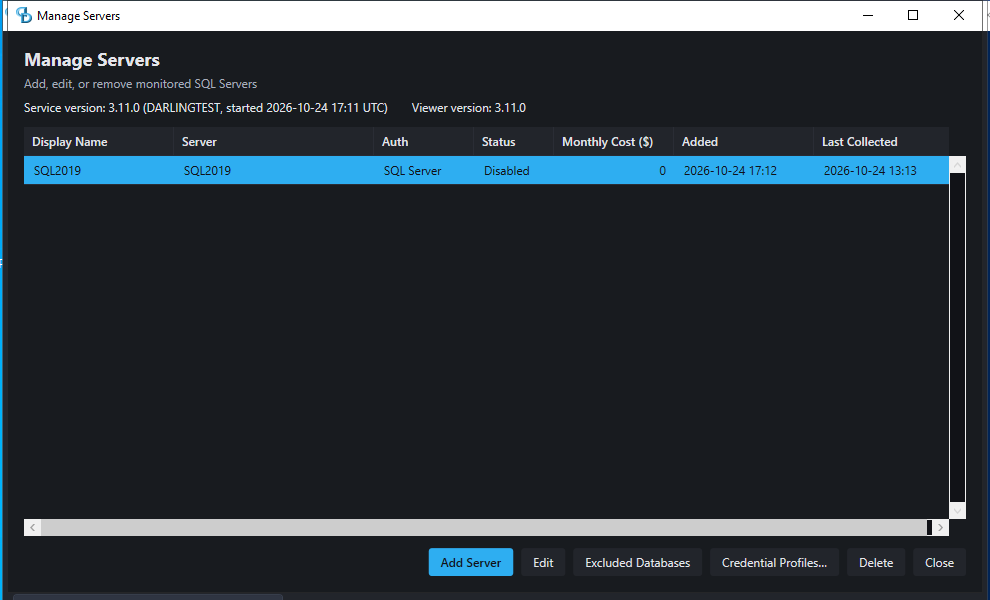
I disabled SQL2019 this way. The status column changed to Disabled, and the service log said the server was removed from the monitored set and collection was stopping.
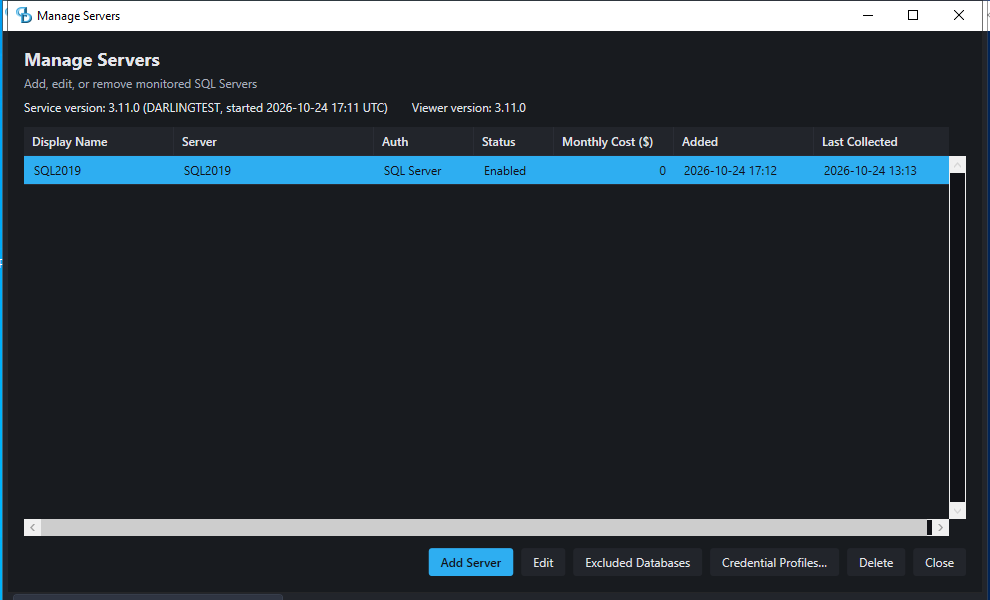
Then I used the same menu item to enable it again. The status went back to Enabled. About a minute after the disable, the service log showed the server added to the monitored set and connected. The definition and the history stay through both steps.
To turn one collector off, run .\PerformanceMonitor.Darling.Service.exe --disable-collector <collector>. It applies to the whole fleet unless you add --server <name>. Use --enable-collector to turn it back on.
Upgrade
Upgrades have their own page, with the script, the backups it keeps and how to roll back: Upgrading Darling.
Uninstall
Run the script from an elevated PowerShell, from the folder that holds uninstall-darling.ps1. I did not run it on the VM, because the VM keeps its Darling install. The screen below is the top of the script, which says what it does.
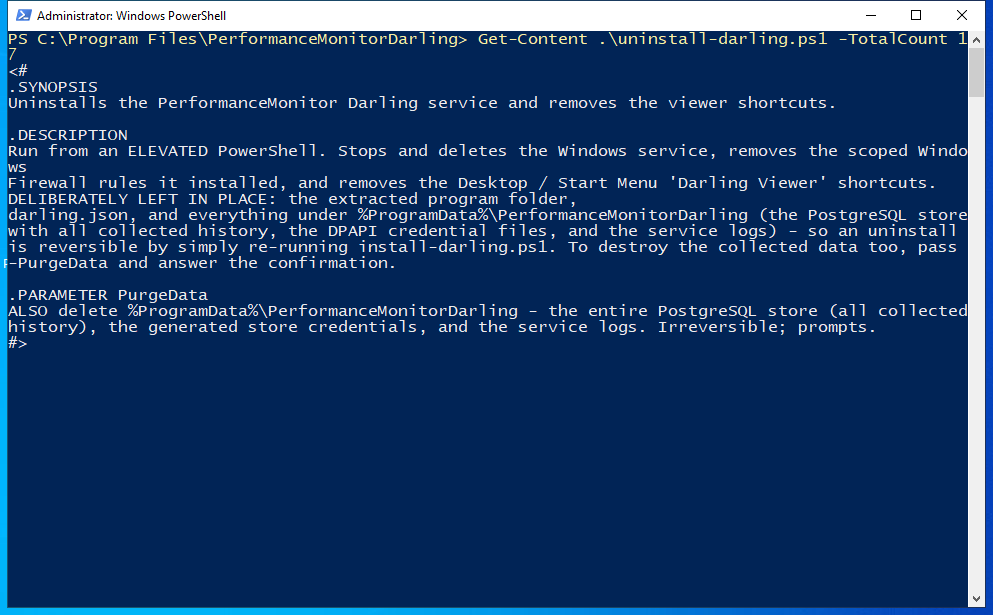
Before you start, know that the uninstall does not touch the monitored servers. If you want this install’s Extended Events sessions gone from them, deal with each server first. See the remove section above.
Without -PurgeData:
.\uninstall-darling.ps1- It stops the service and deletes it, removes the scoped Windows Firewall rules the installer made, and removes the Darling Viewer shortcuts.
- It leaves the program folder,
darling.jsonandC:\ProgramData\PerformanceMonitorDarlingin place. That folder holds the store with all the collected history, the credential files and the logs. - Running
install-darling.ps1again restores the install.
With -PurgeData:
.\uninstall-darling.ps1 -PurgeData- The script asks you to type the word
DELETEto confirm. - It then deletes
C:\ProgramData\PerformanceMonitorDarling: the store with all collected history, the generated store credentials and the service logs. You cannot undo this.
Where everything is
This is the VM’s own listing of the install folder, the store folder, the logs and the Viewer’s folder.
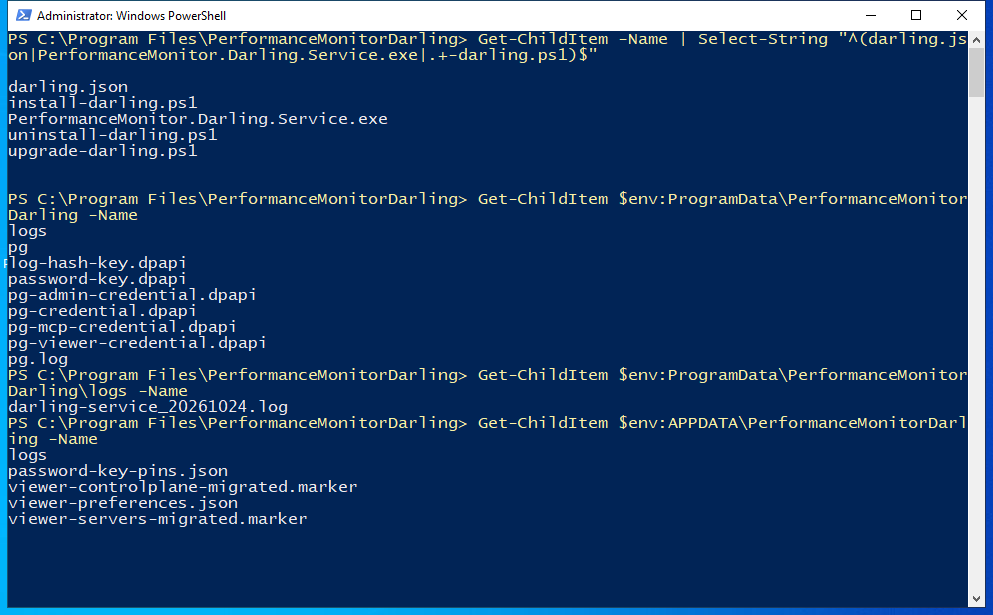
| What | Where |
|---|---|
| Config file | darling.json, beside PerformanceMonitor.Darling.Service.exe |
| Service logs | %ProgramData%\PerformanceMonitorDarling\logs\darling-service_<yyyyMMdd>.log |
| Store (the bundled PostgreSQL) | %ProgramData%\PerformanceMonitorDarling\pg |
| Store credential files | pg-credential.dpapi, pg-admin-credential.dpapi, pg-viewer-credential.dpapi and pg-mcp-credential.dpapi, beside the store folder |
| Password key | password-key.dpapi, in the same ProgramData folder |
| Log-hash key | log-hash-key.dpapi, in the same ProgramData folder |
| Rollback backups | _rollback_manual_<stamp> folders in the install folder, after an upgrade |
| Viewer log | %APPDATA%\PerformanceMonitorDarling\logs\darling-viewer_<yyyyMMdd>.log |
| Viewer preferences | viewer-preferences.json in %APPDATA%\PerformanceMonitorDarling |
Back up darling.json and the password key file. The text version of this page says nothing else in the install folder has to travel with them.